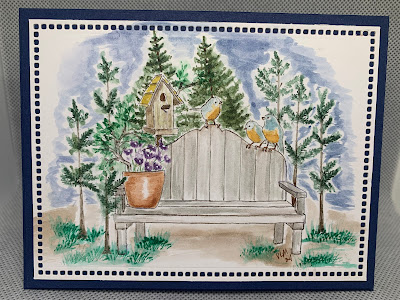
Wanted to use this sketch again, here is my second card for the challenge. Thanks for stopping.
This was one of my favorite stamps when it was current.
Welcome to my little corner on the web. I want to share with you projects I make and at times share how easy it is to copy! Yes you are to copy any and all you see here, some you'll like and some you may not care for but I hope that won't send you away for good. Let's have a GREAT time stamping and creating.
Tuesday, December 29, 2015
TSOT #251 Giving a Heart
It is time for another Try Stampin' On Tuesday challenge. I really had my heart (pun intended:0)
set on making a peek a boo card. The directions for a square card are on Splitcoast Stampers, if you haven't visited before be ready to LOVE it. One of their wonderful features is the Tutorial section!!! and they are great! They have step by step instructions written and with pictures (and some of then have videos).
I wanted the 'peek' part of my card to be heart shaped so I had to rework the directions so the section was wider. (I can use a die cut with the width of almost 3 inches with this shape. It will fit an envelope sized 6.5 x 4.75 and will require no extra postage. (where I live square cards cost more)
Stampin' Up products were used; some old and some new. Getting a jump start on Valentines Day. (this for husband) Our theme is Giving : 29 years ago I Gave my heart to my husband and haven't regretted it once, I can honestly say that I love him more now. He challenges me, encourages me, and Loves me just as I am. Thanks for looking, be sure to look at all the pictures as they show the inside with the peek a boo message.
this show how the pieces fit together, the small "flap"on the left has the 2nd picture/sentiment |
here is the card as you open it; the "flap" comes in front of the opening |
Here is the card opened with the new sentiment showing in the heart shape. |
Tuesday, December 22, 2015
Creative Card Crew #103 Anything Goes
Hello all, I'm so glad you stopped by. This is the last challenge for the year 2015!! I have so enjoyed creating my Visions for you to check out this year and look forward to next year. I did find a little time to create and I hope you will join us in this last challenge of Anything Goes, it should be an easy one. Thanks to our sponsor
This challenge is everyone's favorite!
Anything Goes
Sponsored by Robyn's Fetish
Prize: Robyn’s Fetish Digital Stamps And More is happy to award 3 digital stamps of the winner’s choice to the winner of this challenge.
Robyn's Fetish Digital Stamps And More is proud to sponsor this challenge.
Robyn's Fetish Digital Stamps And More, a division of I Did It Creations, was created and is
owned by Robyn Weinrib. Robyn offers a wonderful variety of digital stamps and digital papers, designed to meet the needs of all digital paper crafting addicts for every occasion.
This card will lay flat to send but sit up when received a cute way to send a card with a twist. I also used a technique that shows you how to look and think outside of your dies. I really wanted to use this shape of die and yet didn't have one big enough for the entire shape. It really isn't hard to do just takes a little free hand cutting. I put the die on my image and marked on the INSIDE where the dragon fly extended. Then I cut beside and up to the marked spot on either side of the dragon fly. Put the die over the area I wanted to cut and the section with the dragon fly on top of the die so it would not cut it.-- The slit I made on either side of the dragon fly allowed me to do this. (hmm did I say that clearly or is it as clear as mud? I fussy cut around the dragon fly after running it through the big shot.
If you can't figure this out with these directions just leave me a comment and I'll be more specific for you. You could leave a comment either way, I'd love to hear what you think of my vision and read and appreciate each and every comment. Have a blessed Christmas, see you next year. Vicki
Tuesday, December 15, 2015
Try Stampin' on Tuesday #249
Courtesy of Crystal
Theme: The Holidays
I KNOW, I know the theme is Holidays and I've made a Birthday card, let me explain. I've been making Christmas cards for many of the posts and am in need of birthday cards as 3 of the 8 in my immediate family have birthdays in December. That doesn't count the extended family!!!
I "sorta" followed the sketch, the only thing I changed is the ribbon at the top instead of the strip at the bottom and my sentiments are all over the front. I hope you will play along with us, just remember that we post a suggested sketch and theme. It's nice to challenge ourselves to follow that but not necessary to enter. I hope you'll join us and have a fun time stamping!!
I used all Stampin' Up products on this one.
Stamp Sets; Amazing Birthday (pg 10) and
Background stamp Dots for Days (pg. 129)
Extras: Dijon ribbon, stamp dimensionals
Colors: Turquoise, Delightful Dijon, whisper white
Pheasant Hill stampers
This is one of the cards that my Seniors center stampers made they all loved it.. I should have had more paint brushes so more than one could be doing each color. I embossed the image on watercolor paper and they did all the rest. I used Watermelon Wonder, Wild Wasabi, and Chocolate Chip markers to show they can watercolor with markers by coloring on anything like a cool whip lid, spritzing with water then painting. The embossing helps keep the colors where you put them but even with that a little outside the lines is okay as lots of water colored cards have that look. The Iced Rhinestones are being carried over into the Homemade from the Heart catalog that is coming out and can be ordered from Jan. 5th. Don't forget that Sale-A-Bration starts then also!!! (Jan. 5th-March 31, 2016) The Homemade from the Heart catalog will run through May 31, 2016. OH MY, oh my but there are some REALLY nice new stamps, dies, designer series paper, punches .... many of these new products are offered in a bundle and that means savings for you!!!! I'm really looking over my copies of the catalogs (a perk of being a demonstrator) trying to narrow down my wish list which was quit long after first look but money doesn't grow on trees.... at least not at my house!!!! ;0)
Tuesday, December 8, 2015
Feasts of the Season # 102
Hello everyone, I am finally getting some stamping done. Today is the Creative Card Crew Feasts of the Season challenge. Has your life ever gotten so busy, crazy that you just didn't have time to do much stamping? Well that's been me the last 8 weeks!!!!! It's late so I'm going to get right to this challenge. I hope you will play along with us, I know it is a busy time of year but maybe you'll be able to find a few minutes to make a card :0)
I thought since I live on a farm and it is winter I'd watercolor this scene and I'm not sure you can tell but I used a puffy paint for a textured snow look. Thanks for stopping by.
Tuesday, December 1, 2015
Try Stampin' on Tuesday challenge 247
I wanted to get this done ( it's the 24th) since I'm so busy during the Thanksgiving week. My family from Indiana comes to me at this time of the year, we have been doing this for almost 30 years. It is a fun but busy weekend and full of FOOD!! We go to my mother-in-laws for Thanksgiving day, my family comes Friday for our Christmas celebration, then to end it all my extended family comes Saturday to celebrate Thanksgiving again. When everyone leaves I often crash!!! Just talked to my sister, she is heading up the meal on Sat. this year and we will be having a smaller group, only about 25.
Enough about all that - here is the sketch and I have to say this was a challenge, not my normal type of card. IT IS good to challenge ourselves though and I hope you like what I came up with. I did deviate a little and didn't use the ornament suggested theme. The Christmas tree does have ornaments on it so it isn't totally without. Sorry about the quality of the picture, I was going to take another and my camera died so it is plugged in charging and I'm going with this since my time is limited today. You can't see in the picture but the base of the tree has puffy snow and I spritzed that piece with some glitter to make it sparkle.
Twist/Theme: Non -Traditional Christmas Colours/Ornaments
Wednesday, November 18, 2015
Singing in the snow.
Here is the 2nd card to go with the Try Stampin' Tuesday sketch that I showed you yesterday, if you didn't see it you should go back and check it out. I thought it turned out rather cute. I seem to be accumulating a good number of Christmas cards so maybe I won't have to make so many the end of Nov/ beginning of Dec.
Thought the trees sorta resembled the criss cross pattern on the sketch and then if you use your imagination you can see the specks of snow and I added a few rhinestones. On the card base used a snowflake embossing folder that mostly got covered up but you can see some of the snowflakes at the top of the card. Thanks for stopping back, have a great day, Vicki and her Visions!
Tuesday, November 17, 2015
Try Stamping challenge 245 Snowflakes
Hello I can't believe that it's almost time for Thanksgiving!! The older I get the quicker time seems to go by. To make it seem even more fleeting the days seem to speed by when 2 of the rooms in your house are being redone. All I can hear is the tick, tick, tick, of the clock and I'm wondering how much time I'm going to have to put my house back together. I am the host for my family get together the Sat. after Thanksgiving day. I usually have a house full and overnight, as my 3 sisters and families, and Dad come for our Christmas celebration on the Friday eve. before. I knew I'd be in a time crunch and had the inspiration for this card last month so decided to get it done and scheduled to post. Here is the card sketch and theme below is my Vision.
Twist: Snow Flakes
I decided to turn my card horizontal and used the show flakes in the background. When my 4 boys were small they loved playing in the snow and making HUGE snowmen and snow forts with snow packed in buckets and then stacked up to make the sides. A piece of plywood usually worked for the top. We always had lots of mittens, gloves, and scarves hanging to dry.
Well I hope you try our challenge and have fun doing it, I really enjoyed playing with this sketch and theme. If you come back tomorrow I'll show you another card I made with this sketch. It isn't exact but sorta fell in line and I think would work. Vicki p.s. I love reading comments :0)
Tuesday, November 3, 2015
Try Stampin' on Tuesday (OR another day :0)
Hello, it has been two weeks since I put my first Vision on for the Try Stampin' on Tuesday Challenge. I hope you feel lead to play with us, as usual we have a sketch and suggested theme for you. I have to admit that this one hand me scratching my head. Tried a few things but just didn't like them then I decided to really twist it up and flip the top piece and instead of banners I put balloons out the top with ribbon hanging down. We have lots of birthdays in this family in the fall and winter. I'm always needing a card for that purpose and decided this sketch would work for that. Thanks a bunch for stopping by. Vicki
Twist: Use ribbon
Twist: Use ribbon
You can't tell but the candles are a small embossing folder that I have and I colored over the raised candles, when I finished I wasn't real thrilled with it and wished I'd just left them plain. I'm sure I'm my worst critic so I left them. Have a wonderful day, and tell me what you think. Vicki
click here to go straight to Try Stampin' On Tuesday
Tuesday, October 20, 2015
Try Stampin' On Tuesday challenge #241
Hello, I am excited to tell all of you who follow me that I've been accepted to another Design Team!! I'm really excited about this as I'll be able to use stamps and that is my passion.
Try Stampin' On Tuesday, every week they have a new challenge with two teams taking turns posting projects. I'll be on Team B and posting every other week. There will be a sketch and a suggested theme for you to use if you desire. It can be a challenge to use what's suggested but that is how we become better, by the challenge to not always do what we are most comfortable with.
Here is the sketch for you to try:
Theme "Leaves - three D"
Here is my Vision;
I have used all Stampin' Up products although some are retired. Now it is your turn to try this lovely sketch and theme. I would love to hear from you if you would be so kind as to leave me a comment or if you have a question I would be more that happy to answer it. Have a wonderful day. Vicki
Saturday, October 17, 2015
Do you love discounts? I Do!
Well here is the discount: If I can help you with anything, just let me know!
Beginning October 19th, Stampin’ Up! is offering 15% off the retail price for all stamps in the Annual and Holiday Catalogs! Now is a great time to get your wish list out and make some additions! Here are the details:
- All regular priced stamp sets will be discounted 15% off the retail price from Oct 19-23. This includes stamps from the Annual Catalog and the Holiday Catalog.
- Bundles, rotary stamps, host sets and clearance rack items are NOT INCLUDED.
- The 15% off stamp sets can be included as part of a Starter Kit (the sale prices will be reflected in the Starter Kit)
Get ready for the sale:
Don’t forget the extra Stampin’ Rewards, too!
Friday, October 16, 2015
Window
I have created another window card, have I told you that I really like this new die from Stampin' Up?!! I wanted to do an outside looking inside with this one and showcase the beautiful wreath hanging on the wall. But the window wasn't big enough so I extended it. Had to do the same with the window box as I wanted that also and then shutters for the window. Gray background has the brick embossing folder used on it and then sponged a little bit. The window box has a festive ribbon with some pine cones that I made with a small flower die from Impression Obsession. What do you think of my vision? I've made quite a few Christmas cards this year, if I keep it up I might have enough done to send all the family a different card.
Thought I'd enter this Vision in a challenge (or two).
Tuesday, October 13, 2015
Creative Card Crew #98 Ribbon
Hello again, today is the Tuesday for the next Creative Card Crew challenge!! We are looking at the theme of Ribbon for the next two weeks. I will say this is for your interpretation, I used a Jute type string/ribbon.
13 October
Sponsored by
Prize: $12 Gift Voucher
I made an easel card, I think they are so much fun to send as the receiver can sit them up and look at them. I thought this image from our sponsor was so great for this time of year with the pumpkins. I have an Aunt who will be getting this card. She just had double knee replacement and I'm sure she will be flying again soon. :0)
I colored this with copic markers, still not a pro with them but enjoy using them.
Thanks for stopping by, now remember you need to join us and make a card, enter it on the blog and you may be the winner of the random selector. Don't wait to long 2 weeks seems to fly by these days.
Have a great day AND if you could, or would please leave me a comment, I read each of them and love to hear from you. Vicki
Monday, October 12, 2015
Challenge but it's not Tuesday! tee hee
Decided to try my hand at a challenge over at Try Stamping on Tuesday, but it is Monday. Also over at Can you case it there is a similar challenge that this card works for. Both challenges wanted something spooky or for Halloween.
I found this stamp set on my shelf (retired Stampin' Up) and thought that the little ghost and the spooky/Halloween themes would go well together. In following with the sketch (on Try Stamping) I added a jack-o-lantern and the bottom black piece that I embossed only the "spooky" smile. On the right hand side of the card I used some old DSP from last year (Stampin' Up) sponged on the cajun craze color and then added the sentiment (also retired Stampin' Up) The black background is embossed then sponged with a bit of white to help the pattern to show. I pulled out my scrap ribbons and added to the top of the card, when I got that done I thought it sorta resembled a bat?.?. Well maybe if you use your imagination.
Okay here is the sketch and my Vision:
Joining challenges can stretch a person to try new and different sketches and themes. It helps me not to get stuck in my own little comfort zone. Thanks for stopping by and looking at my Vision and remember you can play along, just click on the names below and it will take you to the web page for the challenge. Any comments would be appreciated.
try stampin on tuesday
can you case it
Thursday, October 8, 2015
Pheasant Hill stampers #1
I am early this month with getting my cards decided on and all ready for my Pheasant Hill stampers monthly card class. Since it is fall I decided to make one of them with leaves. Now we all know that leaves are not just one color in the fall as they change to their beauty!! I love seeing the trees in the fall with all their color and wanted to in some small way copy that look. I decided to use the baby wipe/stamp pad method. All you have to do is lay a folded baby wipe on something plastic and then add reinkers randomly to fit the size of your stamp. The ink will blend and become a beautiful stamp pad for your fall leaves. After stamping the acorns I did NOT like them as they did not stand out enough so I stamped the acorns in three different colors and then cut and put together with glue dots so they would look more authentic.
Thanks a bunch for stopping by Vicki's Visions have a great day and if you have any question just leave me a comment and I'll get back with you.
Supplies:
Cardstock: Stampin' Up: Chocolate chip, Very vanilla Retired DSP
Stamp set: For All Things (stampin' up)
Extras; Decorative Dots Embossing Folder(stampin' up), Rhinestone, Pop Dots, sponge, re-inkers, baby wipes, big shot
Decided to add this to a challenge or two;
http://crafts4eternity.blogspot.com/
Monday, October 5, 2015
Something New!!
I have been playing around with something new to me. It has been out there but I just haven't jumped on the band wagon till now. It is called Pergamano and it is mostly done with Vellum. Oh my my but you can make some really pretty things....if you have a little bit of time. This is one of those styles of stamping that will take some effort but sooooo worth it in the end. I want to show you my first attempt, now be sure to get ready to leave me a comment :0)
Well what do you think????!!!! I thought it turned out
good. I used vellum for the the top - flowers, and piece with inspiration saying. A colored piece under it to help the embossed vellum to show better. Placed all on a white piece that I textured with the score board.
I did buy a few of the Pergamano tools (there are a lot available). On this card I only used
3 different sizes of Stylus a 1mm , 1.5mm, and one called hockey stick. The hockey stick resembles its name, it will do larger areas leaving a smoother look. I also used an embossing pad, this helps give the vellum some flex.(anything soft and yet firm would work) okay here is how it is done.
1. Stamped the image of flowers on a piece of Heavy vellum with a white pigment pad (I used Brilliance Moonlight White) Allow this to dry for about 20 min. Because it's pigment ink and on the vellum which isn't as porus as card stock you'll have to let it sit.
2. After it is dry, turn the image over onto the embossing pad (stamped side down). Rub with wax paper (helps the stylus to run more smothly). Trace over the lines in your image with a stylus. It is better to do this lightly then go back and trace again, a lighter hand is better so you don't rip the vellum by pressing to hard.
3. On the card above I followed the 2 steps above then cut out the flowers.
4. To get the rectangle design above I used a spellbinders die, placed it on top of a piece of my velum on the embossing pad and traced the design with a stylus (no stamping). 5. Assemble card.
NOTE: Adhering vellum can be tricky to do so it's not visible from the front. I used Crystal Effects, it seemed to dry clear. I did try to add it behind an area where there was a design. I have found NO tape type adhesive that don't show. (not even the ones that say they are for vellum) If you know of something PLEASE leave me a comment and tell me what you've used. Thanks
So what do you think of my newest "vision"? I love to read comments, if you do leave one, let me know where you can be found and I'll stop by and see you. Have a blessed week. Vicki
Tuesday, September 29, 2015
Fawn CCC #97
Time flies, can't believe it is time for another Creative Card Crew challenge!! It has been a busy two weeks for me. My husband and I went on a mini vacation with his mother (92 yrs old and still cleaning houses for old people) his sister, brothers and wives. There were 9 of us and we had a great time. Then when we got home it was to a mess. our boys started on our home improvement project - the downstairs bathroom a "face lift". Of course when a mess is there why not add to it? My sister-in-law and I decided to strip the wallpaper off the walls in the room next to the bathroom. We live in an old farm house with plaster walls and needless to say nothing is easy or quick!! Enough you say on to the challenge!!
#97 Masculine
Sponsored by Eureka and they are giving 3 digi images
I chose this adorable Fawn image. Water colored it with distress markers and then added the die cuts from Impression Obsession (trees) and Sweet and Sassy (grass).
THANKS FOR STOPPING BY, SURE WOULD LOVE A COMMENT OR TWO ON THIS ANOTHER VICKI'S VISION :0)
Decided to add to a few other challenges
Crafting for all Seasons Challenge #110 - Layer It Up
Inspiration Destination Challenge #52 - Anything Goes
Jo's Scrap Shack - FFC #107 Anything Goes
Scrapy Land Challenge #26 - Add an image (using dies from Spellbinders, Memory Box and Cheery Lynn Designs)
Tuesday, September 15, 2015
Creative Card Crew - Fall challenge
Welcome, yep it's that time again! Over at the Creative Card Crew we have a new challenge every 2 weeks and they seem to be coming faster and faster, tee hee. This time of year finds me busy with all the produce we get from our gardens. I'm a gardener and put up most of what we eat, I even 'can' meat(that we raise) so that it is done and on the shelves. Since we raise most of our food I know what we are eating is healthy and not full of preservatives.
Fall is one of my favorite times of the year. I love all the rich colors and the cooler weather in the mornings and evenings. This entry may remind you that soon it will be time to get those pumpkins Our sponsor this time is Marianne's Designs and it looks like she is getting us prepared for Christmas with her give away. Now remember you can't win if you don't enter, so find a little bit of time in your busy day and send us an entry. oh yes and good luck!
96 - Fall
15 September
Sponsored by Marianne's Designs
Wednesday, September 2, 2015
Color Q challenge #306
I decided since I worked so hard yesterday that today I would enter a stamping challenge. This one at Color Q caught my eye.
At first I was thinking flowers then decided to do a quick, clean and simple card. It's a bit of old and new mixed. I used an old background stamp and inked it up with Pool Party then dabbed on the Wisteria Wonder and the Rich Razzleberry colors, used the black marker to cover the birds then stamped and WALA the beautiful 3 toned swirled look! Well I think it turned out nice. In keeping with my simple, clean card I used a new word stamp set(see below) for the sentiments on the front and the inside. Mounted on black and popped up on the Pool Party card base.
The edge and base of the inside were the pieces I cut off the front panel, why throw away when you can decorate the inside with them? I hadn't done this before but I think I like it, what about you? I used the new Tags & Labels Framelits Dies- there are 4 different styles in this set, if you keep scrolling down I have a picture for you.
Tuesday, September 1, 2015
Christmas??? in September!!!
Welcome to Vicki's Visions and the Creative Card Crew Challenge this fortnight is Christmas! Hey I'm one card closer to having my Christmas Cards done!!! :0) Our sponsor this time is Kenny K designs, they have a wide variety of images to choose from, you should head over and check them out.
95 Christmas
1 September
Sponsored by:
Prize: 3 Digi's
The Sleigh is ready for Santa's big run but my oh my where are the reindeer?
I wanted to do a scene behind the sleigh, now that it is done I guess I should have done a north pole scene. Oh well at least I added a snowy look. Thanks for stopping by and I hope you'll get creative with us and enter our challenge. Vicki
Friday, August 28, 2015
Hearth and Home Bundle #3
Winter welcome to you!! this card used the window thinlits die, I cut it down to only have 2 window panels in the door then added the wreath from the new stamp set in the Handmade for the Holidays Stampin' Up fall/ winter mini catalog. This stamp set matches a thinlit die in the main catalog so I didn't have to buy it as I already had it! Yea I really love when they come out with more stamps to match the dies that are already availble!!! This set comes with the wreath, a fern and holly sprig, a bow (this also has a thinlit for quick easy cutting) and 4 words geared to Christmas.
I decided to enter this in a new challenge blog I've come across, it is called Skipping Stones Designs and they challenged us with Christmas.
Thanks for stopping by I'm hoping that I'll be able to keep up a little better and post more, soon the gardens will be done and I'll have more time to create my visions. Have a super great day!
Thursday, August 27, 2015
Hearth and Home Bundle #2
I won't write a book today just tell you that I really like this new bundle!! Today my card once again uses the window and added
the window box from the Thinlits Die (stampin' up). I also used the new embossing folder Brick Wall for the outside of the house.
Okay I know I said I'd keep this short so here you go, and if you would be so kind as to comment I surely would appreciate it!!
the window box from the Thinlits Die (stampin' up). I also used the new embossing folder Brick Wall for the outside of the house.
Okay I know I said I'd keep this short so here you go, and if you would be so kind as to comment I surely would appreciate it!!
Wednesday, August 26, 2015
Hearth and Home Stampin' Up Thinlits Bundle
Hello all, I have been having a great time playing (the last few days) with this new bundle from Stampin' Ups new mini catalog for fall and winter!! The next few posts with be cards that use it, if you go back a few posts you'll see the first card I made for my "pheasant" stampers card class the first of the month. There was probably 2 weeks when I didn't even walk into my craft room let alone stamp. Why you say, let me tell you. My husbands sister passed away, she was such a wonderful person and we did a lot together, our children were about the same age. Down through the years we would babysit for each other and it seemed like a breeze to have all 8 together as they got along so well. She had 4 children, 3 girls and one boy and my 4 boys really felt like the girls were the closest they came to having sisters. She will be missed so much in our family, it was especially hard on my mother-in-law she's 91 in good health and still cleans a couple houses for 'old people' :0) The garden is doing well even with all the rain we had earlier this summer. I'm up to my elbows in tomatoes, made some pickles, and will be canning apples and cushaw squash along with more tomatoes soon. I have my Creative Card Crew entry to get done this week also our new challenge goes live on Sept 1. I have been trying to complete a few crocheting projects that I'm making and I sell kitchen towels that I crochet on the top of for a consignment shop. (they called and are down to one towel)
Enough of that lets get on with the cards, I really love this bundle :0) did I tell you that? It can be used for any season, the stamp set comes with three different tree combinations, three corner stamps (snowflakes, dots and spider in web) 10 different words/sentiments. The window die has been fun to use with other stamps as in my previous post. I went with a fall scene out the window as soon it will be upon us. (I helped my husband bale hay yesterday with a coat on!!)
I had a card class at my house - we stamped the lower half of the card with the background stamp called Hardwood, added designer series paper to the top for a wall paper look, then thin strips across the seam to look like wainscoting. The scene was colored with markers then covered with post it note and sponged color for sky and ground. I'm not sure you can tell in the picture but we added a piece of plastic like window sheet between the scene and the window frame to look like glass. I rolled some card stock to make a curtain rod and added the ribbon (non stampin' up) for a valiance.
Thanks for stopping by and I hope you'll come back and see more from this stamp set and window thinlit die.
Friday, August 14, 2015
Pheasant Hill stampers #2
After making the window card in yesterdays post I decided that something just had to be done with the rectangles that punched out of the window. So I came up with this card, it isn't hard to make a swing card like this just a little time consuming when your doing it for 10. BUT once I got it set up it went really quickly. Took some pictures for you to see the process, then at the end of the post will be Vicki's Vision.
I hope you could understand the directions above and will give this a try, if they helped please leave me a comment, I would LOVE to know! Have a great day and happy crafting!!
Subscribe to:
Posts (Atom)
Just because cards
I have been wanting to use some of my Art Impression Stamps lately and decided that today was the day. I used a new set, It’s one of the wa...
-
A new year and a new blog hop the second Saturday of each month. This is going to be so much fun and I am so hoping I can do this every m...
-
We can never give away to much love! I made this card a little while ago for our Anniversary to give to my husband. I love our busy farm l...
-
SIBH= Stamping Inkspirations Blog Hop Yep it's that time again, our Feb. Blog Hop with what else but a Love theme! I have two really di...