Tuesday, May 29, 2018

TSOT #367 challenge - Sympathy

Sending homemade cards is so special and I think when it comes to sympathy cards that is even more true.  It's sad when we have to send one but when someone receives it I think they may really appreciate them, I know I sure do.
I was excited to play with some new Stampin' Up products that I got and this is the first card.  I  once again turned the card so my metallic focal image piece would fit.  I used the new Painted Glass bundle, I think the  thinlits in this are lovely and quit different than anything I have.  The copper square actually is separate from the detailed outside piece, I just put it back in to put the rose on.        I stamped the rose in both Merry Merlot and Garden Green then used the die to cut both out, cut the leaves off the Merry Merlot one and layered them.  The embossing is one of the two narrow folders that come in  Petal Pair. The sympathy sentiment is embossed with some aged antique embossing powder that I picked up at a craft sale one time.  It is creamy and went well with the very vanilla.
Thanks for stopping and I hope you'll check out all the other designers creations, see you next week with another one of my visions.

Optional Theme: Metallic Accents 

Monday, May 28, 2018

The Impossible Masculine card for the Blog Hop


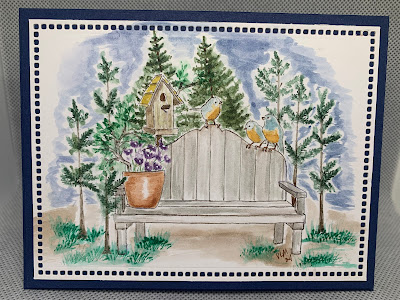
This is the impossible card but I have to tell you that it is possible! :0)   I pulled out some new and old stamps that I have and made a card for one of the home improvement/carpenters that are in this family.  The base was made with the new to me turnabout stamp.  So easy to do in my Stamparatus - that's Stampin' Ups new "power tool"  that will be available June 2nd when the new catalog goes live. Don't you just love all the new stamping "power tools" that are out on the market now!  There will be a list of all participants in this blog hop at the end of this posting - check them out!!!

So how do you make the impossible card, you ask.  Let me share with you just how easy this is!!
  (Video Below- this is something new I'm trying and not sure I have it right.)

A-6 card
 Take a piece of 4 1/2 by 6 1/4 (heavy weight works best) card stock  (some DSP won't work real well for the base as it isn't heavy enough, if you have heavy weight DSP give it a try.)

1.  On the short side using a pencil lightly draw a line on the down the length in the middle - 2 !/4
2.  On one of the long sides lightly draw a line from the edge to the middle line
       at 1 1/4 and  5.
3.   Turn the card 180 degrees to the opposite long edge and draw a line at 3 1/8th from the edge to the middle line.
4.  Now with your scoring tool and a ruler - score the section in between the 1 1/4th and 5" on your pencil line.
5  Three cuts is all you need, the three lines going from the LONG edges to the middle line.


 6. Fold this middle section up.


7.    With the card stock held in my left hand and the long side with the 3 1/8th cut at the bottom.  I take the edge that is shaped like a backwards "L" and flip it back.
That's it!! not impossible at all !!!  Now just decorate and have fun. If you're like me and watching a video is easier then never fear just keep scrolling down and there will be a video for you to watch.


Not sure what I did but this doesn't work


VICKI MILYARD  you are here


Thursday, May 24, 2018

watercolor #3

Okay this is my last one for awhile.  This was my mother-in-laws Mothers Day card.  I really want to try this type of card again, The watercolor paper was masked (taped) off so the stamping/ watercoloring was done in a square in the middle. Then removed the mask (painters tape) and            wha-la!! I think it looks like the  picture has a double frame around it.  I watched a You Tube video on this and kinda used what I had to make a similar card.  The stamps are from Art Impressions and I really enjoy watching Bonnie share how to do this technique.  She challenges me to stretch my abilities and do something different.


Tuesday, May 22, 2018

TSOT challenge #366

Hey there I'm so glad you've stopped by.  I really went Critter Crazy on this one and that just happens to be our theme!!  I think this card is so adorable with all the critters peeking out of my oval frame.  I couldn't decide which ones to use so I made the oval big enough to get them all around and because of that I had to turn the card.
 That's what we do here at Try Stampin if your idea doesn't quit work with the card sketch just turn it, add to it, or take away and join in on the fun.  It's all about getting you to stamping and having fun with all our "stash".  I'm ready to see your card  :0)


Here is the suggested sketch if you'd like to join us!  


Thursday, May 17, 2018

Tuesday, May 15, 2018

Tic-Tac-Tuesday #3 for Try Stampin on Tuesday -toot toot

Hello and a chuga-chuga choo choo to You!! 😊   It's tic-tac-tuesday time.  I wasn't sure where to go with this one then remembered that I had a new train die that might work.  So after pulling it out I decided to go with a railroad theme the stripes, green and blue(diagonal)  worked just great.  I think the is a cute card and will be sent to one of my many great nephews.  I hope you will play along with us - remember that we run each one for a two week span. 


Thanks for stopping by now which line will you be using for the card you make and add for us to see.


Thursday, May 10, 2018

Watercoloring practise

Hi, just wanted to post a couple watercolored cards I made.  I enjoy this technique and find it relaxing so sometimes when I'm home alone I just decided I need to do it.  I like to watch the video clips from Art Impressions and a few other artists that I follow.  I don't always have the same stamps but can use what I have and follow the idea. 

Sunday, May 6, 2018

TSOT #365 Shades of one color for the babies

Do you like to get inspiration from our challenges?  How about Pinterest? Splitcoast Stampers? One thing I enjoy is watching YouTube videos.  There are many out there and I have some that I am a follower of (I follow more that I submit videos).  The idea for my card today came from one of those videos. Often when I see something I really like I then go HUNTING in my stash to see what I have that I can substitute for I don't have the same supplies!!  I made my own silhouette that I did with a color scheme to go along with our theme for this challenge.  I guess I didn't really follow the card layout this time (shown below)  sorry, but as you know we really don't mind!  Just get in there and stamp :0)
                                          Optional Theme: Shades of One Color 

To make the silhouettes I stamped all three of the images from my retired Stampin' up baby set overlapping so it would be connected, then cut around it.  I then turned it over and used the opposite side to sponge my colors onto.  I couldn't decide which one I liked the best so I sat them all up and took the picture, hope you don't mind.  We have quite a few babies due in the family and I know two of them will be boys.  I usually make more than one card when I'm stamping so I have one to send and then some others for my file.   Stamped the stars around the white front layer with the same shades as what was used on the silhouette piece.  The Special is a die cut that I have and the BABY is stamped. 

Thanks for stopping by If you came from Try Stampin's blog you have enjoyed seeing what all the others created with the card layout and theme, now remember they are for your inspiration!!  Have fun and we'll be looking forward to what all of you make and share with us!

Optional Theme: Shades of One Color 

Tuesday, May 1, 2018

Crayon Color resist and Color Burst

Let's have another technique challenge! This is our 5th one have you been playing along with us?  I do hope we've inspired you just a wee-bit.    This month Donna decided to pull out a technique that I had forgotten all about.  That's why I think this is fun, someone will remember or see a new technique and we're off!! 

As I was thinking about what to do for this one I kept coming back to the idea that I wondered how this one would work with stencils, white crayon, and color burst (like brusho's).  Soooo I decided to give it a try and really liked how it turned out!

This is a gate fold card with the flower attached to one side and the sentiment piece attached to the other.

1.  Placed the mask (from the Pattern party decorative masks - stampin' up) on watercolor paper.
2.  Colored desired spaces with crayon then removed mask
3. sprinkled the color burst over card and spritzed with water. (the crayon resisted the color - guess I didn't get it completely colored in some spaces but I like the look!)
4. I dried with the heat gun then decorated it up.  Sad to see this go - Lots of Love stamp set and Iridescent Sequins.

thanks for stopping by and maybe you'll give this a try and tell me how it turned out for you.  


Homemade DSP

 Have you ever made your own DSP paper? I have a few times, there’s a YouTube channel called Artful Stamping with Ruth that I enjoy watching...