Welcome to my little corner on the web. I want to share with you projects I make and at times share how easy it is to copy! Yes you are to copy any and all you see here, some you'll like and some you may not care for but I hope that won't send you away for good. Let's have a GREAT time stamping and creating.
Tuesday, February 23, 2021
TSOT challenge 495

Tuesday, February 16, 2021
TSOT challenge 494 - Bleaching
I was glad to see this technique, it’s one that I haven’t done in a long time. Years ago I took a piece of each if our card stock and made myself a sample of the bleached color each color of card stock turns. This gave me a chance to try out some of the new colors. I made 2 cards because I could 😊, and I just loved their color change. I kept the cards really simple so the bleaching wouldn’t get lost.
The first is done on rococo rose card stock. The bleach seemed to me to turn a vanilla shade so I mounted my focal image on vanilla and added a piece of embossed(ornate floral 3D) rococo rose to a vanilla card base. Oh yes I added a vanilla seam binding ribbon strip also-guess it’s discontinued.
The second card I bleached the vine stamp on pretty peacock and I loved the greenish/yellow tone it made. Tried to pull more of the yellow look out with the flower on my focal piece. What do you think, did it make it look more yellowish? Layered on a so saffron piece and once again embossed(subtle 3D) the background piece then added to a vanilla card base.
Sunday, February 14, 2021
2 Bay window cards
I saw this card and thought it was so neat. I followed the you tube and made one similar. It’s a big card!!! I made mine 8.25x5.5 I’m pretty sure I’ll have to make an envelope. The creator was from the UK.-Jan Brown - her you tube title is - Tonys bay window fancy fold card #548
The bay window tucks behind the area on the right side of the card that is popped out, but it will fold flat for mailing.
Then I decided to see if there was an A2 bay window card tutorial. Rachel Tessman had one,see below for her measurements. After watching the basic way to make I redid the measurements for a slightly bigger envelope I had and created this dragonfly card. It's taller and the front isn't as wide so my bay window sections were more narrow.
For a quick basics on how to make a bay window card: Rachel Tessmans measurements -
Card base -11 x 4.25 score middle 5.5
Measure the front of your card with this size base card it will be - 4.25x5.5
now score at 3/8, 1 7/8, 3 5/8, 5 1/8 fold valleys on the first and last score line and the middle ones mountain folds.
Tips:
Measure the front of your card ---- basically you need 2 narrow widths on the edge and next to the middle score on the card front and with what's left you divide into thirds to make the bay window.
my dragon fly card ( 6.5 x 4.3/4) I made the 2 narrow "edges" different widths to make the bay window sections easier to measure. I made the edge measurement slightly bigger since my pop out piece was smaller. It worked great and stands up nicely. The top whale card is bigger and the bay window sections are wider making it nice to cut the port holes to see through.
Saturday, February 13, 2021
Love is in the Air - SIBH
FEBRUARY 2021
Angie McKenzie ● Alejandra Gomez ● Vicki Milyard
Tricia Butts ● Rochelle Laird-Smith ● Annette Ball
Jo Blackman ● Leonie Stuart ● Jan Musselman
Terry Hamilton ● Lisa Mackey ● Deb Macdowell
Sue Allen ● Gez Carpenter ● Rebecca-Jo Unwin
Linda Moore ● Satomi Wellard ● Aurélie Fabre
Melissa Faust ● JoAnn Pollock ● Narelle Fasulo
Mo Rootes ● Karen Henderson ● Susan Webster
Susan Simpson ● Anne Marie Hile ● Ann Krucek
Shel Anderson ● Kimberley Morris ● Sharon Hashimoto Burkert
Danielle Kassing ● Chris Smith ● Mikaela Titheridge
Elaine de Montmorency ● Jill Chapman ● Teri West ● Libby Fens
Thursday, February 11, 2021
Snailed it!
I made a double slider card today it was fun I enjoyed it I think it’s kind of cute I like these snails. Stampin’ up has them in their mini catalog lots of ideas with this set!! I sat down last night and blender/Coptic colored a page full of the images that I had stamped.
Tuesday, February 9, 2021
TSOT challenge 493 - peek a boo birthday
This is a very unusual card layout, I've never done one like it but it was fun with the suggested theme - Peek a boo. I've had these dies for a while and never used them so it was fun to pull them out. I altered the "tree" trunk and animals - stamped them then cut them out to add to the plain trunk where my opening peek a boo was placed. Thanks for stopping and I do hope to see how you've interpreted this design.

Tuesday, February 2, 2021
TSOT challenge 492 Love is in the air!
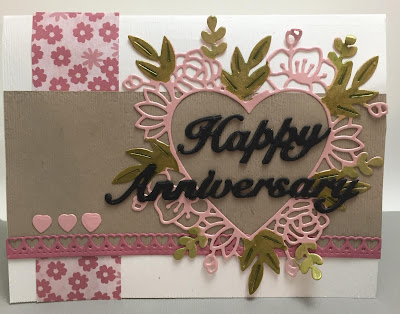
Quick and sweet post this time. I already made my valentine his card😊, so I made an anniversary card I’m always in need of one for some couple in this big family!
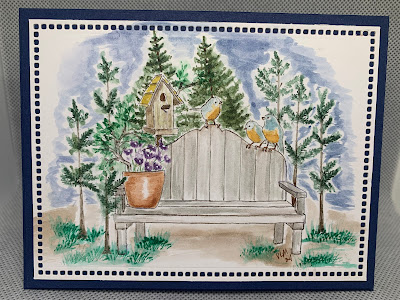
Just because cards
I have been wanting to use some of my Art Impression Stamps lately and decided that today was the day. I used a new set, It’s one of the wa...

-
Welcome to the first blog hop of the year for The Joy Of Sets! Thank you for hopping over. I decided to make a gift bag and card a...
-
A new year and a new blog hop the second Saturday of each month. This is going to be so much fun and I am so hoping I can do this every m...
-
Decided to check out some challenges today as I'm stuck at home. Living back a lane I often get snowed in. The trucks make it out but ...


