Tuesday, December 11, 2018

TSOT #388, a Birthday, celebrate

Hello, this was a quicky for me.  I have two sons with birthdays 6 days apart in December and that makes for a busy month.  Glad this sketch was a good one for son #4.  I used some Art Impression stamps to do the trees, he is in landscaping so I think he'll like it.  I turned the sketch and then instead of a circle I used a banner for the happy birthday.  It will definitely be a day to celebrate.


May you be blessed this season with the love of our heavenly Father and be filled with his Spirit.  Hope you all have a joyful Christmas filled with family, friends and love. See you all at the end of the month.

Tuesday, December 4, 2018

Embossing with Try Stampin On Tuesday #387

Hello everyone are you ready for a great sketch??  This one is so nice and easy to use, any shape on the horizontal strip will do.  Embossing is our suggested them and it in my opinion always adds a bit of  "class" to your card. Here I've used heat and dry embossing.  The dry embossing was done with a new embossing folder from Stampin' Up that I have fallen in love with (Subtle Dynamic).  It adds just a touch to that card that needs a little but nothing to detract from the focal point.  I have been playing around with some alcohol inks and the Lift Pad and pen from Tim Holtz. On one of the backgrounds I made I embossed the image in white and then on a second plain piece of card stock embossed with gold.  Using the Lift Pen I picked up the ink from the alcohol piece then colored in the gold embossed piece in the corresponding area. Here is a look at the two together- this will allow me to get 2 cards from the one background alcohol piece I made. You may not be able to see it real well but the alcohol piece is lighter where I lifted the color. Thanks for stopping by and have fun with this wonderful sketch!


Sunday, December 2, 2018

Christmas card time

One stamp set, two colors (and black ink), and a few extras = 2018 Christmas cards. Trying to get them all done and sent out sooner.😏


Tuesday, November 27, 2018

Festive tissue box cover

I thought it would be fun to make a tissue box cover for the season. I used one stamp set, two  stamp pad colors- Merry Merlot, Tranqual Tide (and black). All stamped on crumb cake card stock.


Monday, November 26, 2018

TSOT #386 Bling it Up

I'm not a big "blinger" is that a word?  I like adding little bits but just don't always do it. (some things added to the front of the card make it need extra postage)  These trees and stars have glitter added onto them and once again that is really hard to see in a photo - so that is my bling on this card.  It is a fun one though as the inside pieces move when it is opened.


The penguin and reindeer move apart the farther the card is opened :0)
I sorta kinda tried to use the card layout this time😊

Monday, November 19, 2018

TSOT # 385 Non Traditional Christmas/Holiday

Okay for some of you this might not seem non-taditional but for this Ohio girl it is!!  I used colors that I've never used on a Christmas card before and the cacti are not traditional. Hung the stockings on the cacti...hope the little ones don't get poked getting their stocking stuffers out.😊 Thanks for taking the time to stop by.


Tuesday, November 13, 2018

Thank You - TSOT #384


Hello, welcome once again or I'm glad you stopped by for first time visitors.  I DID NOT follow the card layout this time, had some new products and wanted to use them.  I DID use the optional theme though - Thank You 

The thanks is new it cuts the word without cutting it off the card piece, I thought it was neat and decided to get it for myself. 😊  The wreath stamp is new also and is a turnabout stamp (non Stampin'Up). It was stamped in copper with the shimmer paint from Stampin' Up and then Tranqual Tide.  The ribbon is also T. Tide from Stampin' Up.  (I use a good bit of Stampin' UP product because I'm a demonstrator)  I mounted it on a piece of copper paper (S.UP) I'm really loving that color this year and it all flows together with the shimmer paint and the "hanging" leaf. 


Here is the Card layout if your interested in using it.  It isn't necessary to enter so don't be afraid to join us either way.

Monday, November 5, 2018

Tic-Tac-Tuesday #6 AND Team Up with Double Trouble


I haven't been able to participate in one of these team ups with Double  Trouble yet but really wanted to get it done this time.  I followed two lines on the Try Stampin'  Tic-Tac Tuesday  layout      Diagonal - green, trees, plaid and the far left - green, glitter, stamping.  The glitter is soooo hard to see when taking a picture but I did add it and some 'snow' to the Christmas tree panel (close up below).  Hope you'll have as much fun with this one as I did.  Be sure to look at all of the extra ways you can "win" over on Double Trouble with the "Things 1,2,and 3" additional challenges shown below. I'm pretty sure I included all for the three "Things" challenges.     Here is My Vision :0)


I used a Karen Burnitson die to make this card, it really isn't hard but just time consuming when you haven't used the die for a looong time. 
                         Thought this close up might show the 'snow' and glitter a bit???!!!


                    ***Team Up with Double Trouble***
THING 1 Trouble Maker 
says "Only 6 weeks to Christmas" - and less if you want to get them in the mail before the 15th....so we challenge  you to creating Christmas or Holiday projects.  


THING 2 Double Dare 
says if you use a row, column or diagonal from the TicTacToe Board below you can link your project to Try Stamping on Tuesday too.  But don't stop here, maybe you want to add Twisted Sister's Optional Twist below and earn extra chance on Double Trouble's random draw prize.  


THING 3: Twisted Sister "Dear Santa, I can explain, it's who I hang out with!" Help me
 get on the Nice List and include anything on your project that hangs - stockings, garland, 
ornaments, lights, candles, etc. Remember this is an OPTIONAL TWIST but it's so easy that 
we hope everyone will join in. If you do the twist, Double Trouble will give you an extra 
chance in our random draw.  

Thursday, November 1, 2018

November technique challenge - glitter background

I thought and thought about what to do for this challenge and then remembered some products that I had purchased YEARS ago.  Colored glitter for using on acetate, so I do hope this is okay because you see the whole background of this piece of acetate is "colored" with glitter. 

This piece of acetate came with the scene printed on it but I could have used a clear piece and stazon ink.  Each color of glitter was added then I let the whole thing dry overnight.  I think it turned out rather nice and the glitter really shows in person. (it is so hard to get glitter to show up in a photo) Below is a close up of the scene - thought you might be able to see it better.
I used linen thread to hold the piece onto the marina mist cardstock that I ran through the big shot with the new and wonderful embossing folder from Stampin' Up called -Subtle Dimension

Tuesday, October 30, 2018

TSOT #383 Patterned paper


Hello all and a happy day to you!  I spent an enjoyable day yesterday stamping with 2 dear friends!  We stamped, talked, laughed, and drank coffee or diet coke(that wasn't me 😩 I'm not a soda/pop person).
I finished some cards to work ahead a bit for you since the next three weeks will be busy, busy, busy.  I'm working my part time job and then trying to get all this house put back together since I host Thanksgiving!!!  Do you know that it is only three weeks away!!!!  (AHHHHHHH)    So after saying all that I'm trying to give myself a pep talk - you know the one that you tell yourself  that you'll be okay and you'll get it all done - wonderwoman!!!! Right!!!!!

Enough you say just show me the card - Ooookaaaay :0)


  Fall/Autumn is such a beautiful time of the year, it is a busy one for my Farmer husband (and his wife).  He doesn't make shocks like this with the corn but I just thought this was a beautiful stamp and wanted to let him know how grateful I am that he works so hard for us.  Thanks for stopping by and maybe you'll find time to make a card for this fabulous challenge and let the pattern paper do much of the "behind" the scene work.

        Optional Theme: Cozy Patterns

Tuesday, October 23, 2018

TSOT #382 Have fun with die cuts!!!

Hello everyone, I'm so glad you stopped by we have a fun optional theme for you, die cuts!!  They give the card just that little bit of "class."  I always tell my people that the die machines - let's face it there are many different kinds- are the stampers "Power tools"!  Just like a power tool helps my husband and four boys do quicker and better work with whatever they are working on.  My Big Shot helps me do a quicker and better job on cards and scrapbooks and handmade items for the home and making things for a  craft sale and .......   :0)         I could go on but won't.     


My card has die cuts on it!!! I love the season of fall and enjoy putting a wreath on my front door that I have made. This wreath will not go on my door but it will go to someones house.  It was made with die cuts and then to follow the layout of the card the three "boxes" are there just not turned.
  I hope you'll give this card a try it was a good one and lends its self to many different types of cards as you can see with all the designer cards.  Have fun!!!!!


 Optional Theme: Die Cuts


Tuesday, October 16, 2018

Try Stampin color challenge #5

Hello everyone, I'm sorry once again for not being able to participate in the last couple challenges, between work on the house and computer/internet problems it has been pretty hit and miss for me.  I was playing around with the three suggested colors and shimmer paint.  The pink and purple sorta blended together but they were there.  This is a smooch card.  The ink was put down then a bit of water added then the card stock smooched/pressed into the ink.   I cut my panel down then mounted it a few times.  The stamp set I used is a new one that I just got.  I love it, it reminds me of home.  We live on my husbands family home place that his great grandfather built and it has a barn, old windmill and just recently we put up a silo.  Ours is a bank barn but I still love this set. The shimmer paint was put on the card first with plastic wrap. Just put a drop on a lid of some sort (like coolwhip) then take the plastic wrap and scrunch it up in your hand dab in the shimmer paint then dab around on your card let dry completely. If you look closely you can see the way it makes the background look sorta crackled.  Tonight before I added this card we saw a sunset that was brighter than this, almost redish- orange, it was beautiful. Thanks for stopping by and have a wonderful time playing with these three colors.  I know there are lots of ways to use them, be sure to check out all the designers cards.


Tuesday, September 25, 2018

Challenge 380 for TSOT

I'm back and oh does/did it feel good to  be able to craft again.  I probably should have been putting the room back together that just got painted but a girl has to have some down time - right?!!!!!

   Our suggested theme was embossing and I wanted to show how to emboss with your die cuts!  Yep you read that right, if you haven't heard of this one it really will let you get some more "omph" out of your dies and $$. (You will need some embossing mats for this technique) I have added a few pictures for you to see below and that will help show just how to expand on the use of your dies.

This card is made using a old die cut background which is pictured below actually cut out.  I embossed the design onto the piece of Coastal Cabana. After taking the picture I decided to use this for a 40th anniversary card and embossed a small Happy Anniversary so it is doubley embossed in two ways!

This has been embossed with a die that will only emboss not cut on the left side.


Die on cd.stock with some spaces popped out.          This shows the cut piece laying on black cd.stock

 This shows how a smaller die cuts the shape out and the detail
                          This show how the die embosses the detail on the shape without cutting it out.
jYou can do this with ANY die cut no matter how plain or intricate it is.

 Well I do hope you have been inspired to go and give this technique a try.   Stampin Up sells the mats needed to emboss with your dies.  If you don't already have a demonstrator I'd love to help you out.  Just leave a comment and how I can reach you and I'll help.  If you do have a demonstrator I'm sure she'll love to help. They come in a bundle and really aren't that expensive,  well worth spending a bit more to take your dies to a new level!!!   

  Don't forget to check out all the other cards, they are amazing - we all are different in how we interpret a design and theme.  Don't let it scare you off - just do your own thing!!!    Thanks for stopping by and have a wonderful day!

Saturday, September 1, 2018

September technique challenge - Fun Fold cards!!

I love doing fun fold cards and this one is easy - directions below.


One of my enjoyments with card making is water coloring. I think it is such a relaxing way to  make many different looks.  Here I embossed the image with white and then water colored .  I love the softness of this, you can get different shades of the color your using just by adding more water.  If you don't have actual water colors like I used with this card, I've also done water coloring with a stamp pad and markers so don't let that stop you.  Just take a water based marker (Stampin' Up/ Crayola/Tombow) and scribble some color on a white surface -like a cool whip lid- and then add water. With a stamp pad just squeeze to get ink on the lid then add water or you could swipe the pad on a cool whip lid to transfer the ink. If you've used the lid of your stamp pad and have a lot of water in it I'd probably wipe it off with a paper towel, if it's not real watery just leave it for the next time you decide to do some water coloring it will dry but you can re-activate it with ..... water 😊

I added the Hello sentiment by cutting it three times and layering it so it pops a bit.  Oh yes that was Augusts technique challenge - add dimension without using pop dots or adhesive foam tape.


This card is a fun one to make - it is different, will fold flat for mailing yet has a nice base for the recipient to set it up.

Gray Piece is cut 4 1/4 x 11  score it at 5 1/2, 7, 9, 10 1/2
Fold and burnish all score lines in the same direction.   
To assemble this base piece, lay your card stock on a flat surface up to the 7" fold line. Now add double - sided tape to the small 1/2" end section, remove the backing and fold under to adhere to the back of the card.  This will form a "box" on the bottom of the card so it will sit on a table.  When this is mailed the card needs to fold up on the 5 1/2 score line to fit in regular size envelope.

White decorated piece
5 1/2 x 3 1/4  scored at  3 1/2, 5    
The large 3 1/2" section is my main section for stamping,  this is adhered to the "box" section on the card at the 7" score line, it will extend up above the box. Fold at the 3 1/2 and 5" lines and then add adhesive to the small 1/2 inch section to attach to the card base. Be sure to lay the card flat, folded at the 7" score line and fold the 1/2 back onto to the (gray) base of the card. ( Mine is about a half inch from the top of the card when folded flat in the middle -5 1/2- for mailing.)

Hope that is NOT as clear a mud.  It really isn't hard and is a different type of  fun-fold card.

The white piece can be any size or shape as long as you remember that the piece needs one end scored with the same width as your "box"(mine is 1 1/2") and a small section that will adhere to the card base (mine 1/2").  You also don't want to make it to much taller or it will fold up over the back of the card when it is laying flat to mail (mine is about a 1/2"  shorter than card base when folded).
I add a blank panel onto the back of the card for more space to write my personal message.

Tuesday, August 28, 2018

Family Fun for TSOT #377


Here is my Family Fun card for our 377th card sketch challenge.  Family Fun because this will go to some sweet youngster in the family.  Hopefully making them smile because the little elephant is dancing along the card (on the slider).  Sometimes he will even do a summersault. πŸ˜„


Tuesday, August 21, 2018

Color challenge #4 for Try Stampin'


I always enjoy doing color challenges because then I can use any layout that I want.  These colors have such a wide range of possibilities.  I decided to go with darker shades than what's pictured.  What strikes your fancy when you look at this challenge?  I do hope many will join us it's always nice to see what others do with the colors.


Tuesday, August 14, 2018

#376 Try Stampin' on Tuesday or Not


Hello, I have a fun interactive card for you today.  Out theme is "pop it up".  well my cards front panel will pop and swing out. I used a Crafty Cutts Dies designed by Michelle Cutts called the Flip-Flop  The front panel where the typewriter is will pop out when you pull on the little handle on the side.  By polling and pushing that piece the front panel will pop and swing open and close.  It can be made in three different sized and this is the medium size. Thanks for stopping in and don't forget to check out all the other designers cards AND come play with us!!!  We love seeing all your cards and the ideas you come up with, please remember that we make suggestions for you to stretch yourself but it isn't required. 


I wanted you to see how the front pops/swings out, it will lay completely back.  I wrote my birthday message on the back of the swing section.  I made a small video but when I add to this blog it won't play - anyone know how to do that on a blog?  When I click on the Insert Video icon I can pick a video to add and it seems to be downloading but this is all that comes up, any help would be appreciated. Just leave in the comments if you can help :0)
           Have a wonderful day and remember to do some stamping!!! 

Tuesday, August 7, 2018

Try Stampin on Tuesday or Not challenge 375

It's time again, and our optional theme is Stripes.  Now I just so happened to have cleaned up my desk and found this scrap strip with stripes that I had made for another card awhile ago. Soooo it had to be used on a card for this challenge.  I decided to play with a new set and gear it for my husband.  One of those no special event or reasons other than because I wanted to cards.  I used the die that actually cuts a puzzle to emboss the blue piece beside the stripe piece.  The three puzzle pieces cut out were stamped then cut with the die that matches. 
Remember that our challenges run for 2 weeks, so that gives you plenty of time to come up with something and if you don't want to use the theme that's okay we just want you to stamp.  It is always good to challenge ourselves with something new but doesn't always work out when we get to crafting.  Have a wonderful day, thanks for looking and be sure to check out all the other designers.


Optional Theme: Stripes


Tuesday, July 31, 2018

Try Stampin' on Tuesday #374


Hello everyone I'm so glad to be back!  I really do enjoy trying to come up with a card that will be an inspiration for you and possibly show you something new.  This card has the cut out windows in the front but on the inside it has a pop out panel.    There are many different types of cards that you could make with this concept. ( Directions will be listed below with picture of pop mechanism)

    Our theme is Anchors Away so I decided to do a water scene,  using a new and old stamp set.


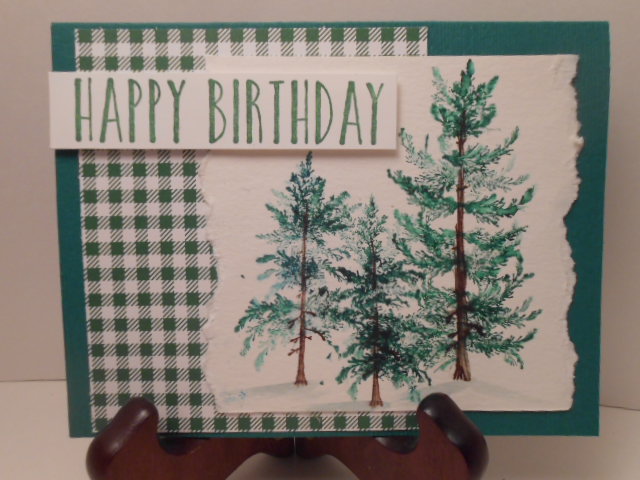
Here is the inspiration card designed by Donna.


Directions for pop out mechanism.
 1. my card stock was 3x5  place the 4" side on your score board and score at 3/4", 1.5", 4.25"
     ( your piece added onto this can be any size as long as it doesn't show when the card is closed) the         idea is the  have three score lines with three flaps all the same width- one on one end and two on        the opposite end).  Burnish all folds the same direction. If your making a window on the front of          the card, be sure your opening is far enough away from the crease of the card or you'll see your            pop up through the opening. 
2.   add your adhesive to the 2 end flaps.  Remove the adhesive backing from the end with one flap            and put it right up against the crease of the card, lay the front of the card on top of it so that it is          adhered to the front inside.
3.  Now open card the and lay the pop out against the inside/front with the second score line                     folded over.  Remove the backing from the adhesive on the end section then fold the card base             onto the pop up  mechanism adhering this to the card back. This will give you a piece that pops           away from the back of the card 3/4ths an inch that you can attach something to.  It will lay flat for       mailing, yet pop out when the card is opened for a nice surprise.


A  top  folding card is also nice - 4.25x11  scored at 5.5 this one is nice because there is more room to write your message on the botom under the pop out.
1.  Cut a window in front of card if desired be sure not to cut to close to the crease (stay about 3/4ths" inch away)
2.  cut a piece of card stock  4.25" x 6"  score at 3/4ths", 4 1/2, and 5 1/4
3.  repeat as above with the adhesive on the 2 end flaps.
4.  remove the adhesive backing from the end with one crease line and lay it right on the crease, fold the card front onto this piece.
5.  Remove the adhesive backing from the other end and folding on the second score line close the back of the card onto it.

This will give a pop out that is the full width of the card, as I said you can make it larger like this or smaller,  just remember that you need three scored lines and three sections all the same width.  one flap on one end and two on the other.  (Jennifer McGuire has a nice video on this fun fold card.)

Wednesday, July 25, 2018

AOL for Try Stampin on Tuesday 😞

Sometimes life just gets busy and you wonder when you can get off the merry-go-round!!  We made a quick trip out west for a family reunion. Extended family we had never met before so that was nice, but really made me busy when we got home. The garden and I had ordered cherries and blueberries. They came in while we were gone so that needed taken care of right away. I work part time but this week I'm on for all week! All the work I needed to get done had be be finished before the 23rd. I had 4 days, felt like I needed to go to work so I could show down and rest. πŸ˜€ .
I'm planning to be back in the line up for the July 31st posting. The cards for the 24th posting we're fabulous, check them out!!
Happy stamping everyone!

Tuesday, July 10, 2018

#372 Try Stampin' challenge

Hello, here we are with another challenge.  Summer is a harder time for me to stamp as I have lots of garden produce to take care of.  Do you find that your not stamping as often?  I try to keep up with all the challenges and do all the outside/inside jobs - picking and canning or freezing.
For this card I turned the image and then sponged some, I do believe I've told you that I enjoy sponging cards  πŸ˜ƒ 

Here is the sketch; Why don't you take a few min. and give it a try.

Homemade DSP

 Have you ever made your own DSP paper? I have a few times, there’s a YouTube channel called Artful Stamping with Ruth that I enjoy watching...