 Embossed the leaves with black then colored with markers layering the colors and blending them so the leaves didn't all look the same. Sponged the sunrise colors into the background sorta being careful to not go over the leaves but nothing showed up in the areas where it did. Now I need to do this with some fall colored leaves. thanks for looking.
Wednesday, September 26, 2012
sunrise
Embossed the leaves with black then colored with markers layering the colors and blending them so the leaves didn't all look the same. Sponged the sunrise colors into the background sorta being careful to not go over the leaves but nothing showed up in the areas where it did. Now I need to do this with some fall colored leaves. thanks for looking.Saturday, September 22, 2012
wedding gift package
 I made this package for a wedding, the bride loved sunflowers and decorated with them and mums in an outside wedding.
Wednesday, September 19, 2012
Sponged butterfly
 Easy card to make here's how: 1. cut a stencil from the beautiful buterflies die (or any shape you want to use)
2. Lay the piece that has the shape cut out of it(your stencil) over your cardstock and using sponges apply the color starting at the bottom, each time you add a new color overlap the previous color so the colors blend nicely.
3. take your stencil off and then use your sponged image on your card in the desired way. I put mine through the big shot with an embossing folder it give it some texture.
4. Added a gray layer behind the sponged image then wrapped this with the ribbon.
5. Put on the card base - 5 1/2 x 4 1/4 folded in half. you could add a word saying in the midde of the butterfly. Thanks for looking
Thursday, September 13, 2012
Front and Backs with Copic's
 Well I tried to turn the front of these 2 cards but couldn't figure it out sorry.
Colored with my copic markers all but the grass area. Doesn't that little boy look ornery?


Wednesday, September 5, 2012
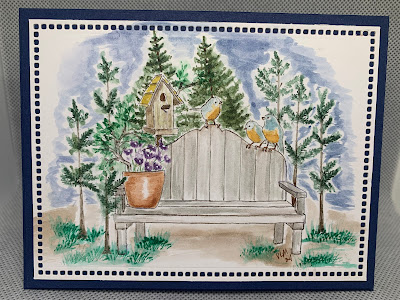
Loving this new stamp set
 This is my first card with this new set, can't wait to play with it more!!
Subscribe to:
Comments (Atom)
Just because cards
I have been wanting to use some of my Art Impression Stamps lately and decided that today was the day. I used a new set, It’s one of the wa...
-
 Welcome to the first blog hop of the year for The Joy Of Sets! Thank you for hopping over. I decided to make a gift bag and card a...
 -
A new year and a new blog hop the second Saturday of each month. This is going to be so much fun and I am so hoping I can do this every m...
-
 Decided to check out some challenges today as I'm stuck at home. Living back a lane I often get snowed in. The trucks make it out but ...
